Start / Create Azure Netapp Files share
Create Azure Netapp Files share
In this step, you will create a Azure Netapp Files share to store your FSLogix profiles.
IMPORTANT
You need to be granted access to the Azure NetApp Files service.
To request access to the service, see the Azure NetApp Files waitlist submission page.
You must wait for an official confirmation email from the Azure NetApp Files team before continuing.
NOTE
If you want to keep cost to a minimum, you should remove the ANF after this lab!
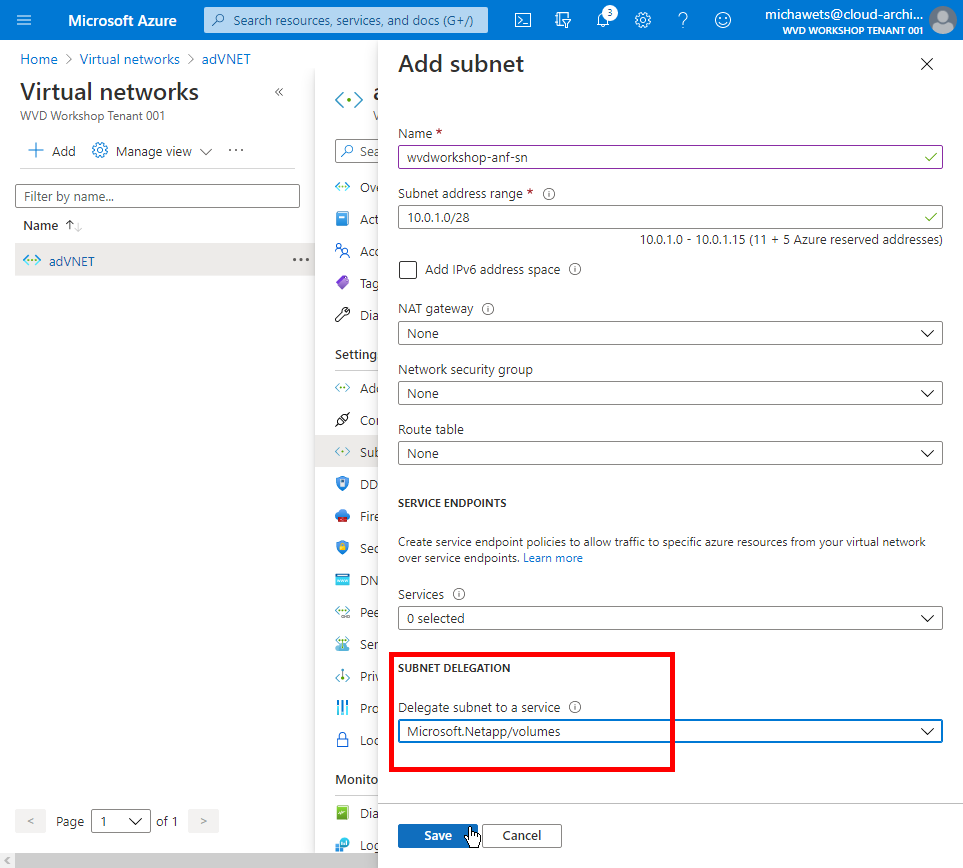
Add ANF Subnet to the VNET
To be able to add an ANF Volume to your environment, ANF needs a NetApp Files Delegated Subnet.
-
Sign in on the Azure Portal with your credentials.
-
Open your Virtual Network (in the workshop it is normally adVNET), click on Subnets and click on +Subnet

- Fill in the Name for the subnet, fill in the Subnet address range (a /28 is sufficient!), select Microsoft.Netapp/volumes and click on Save
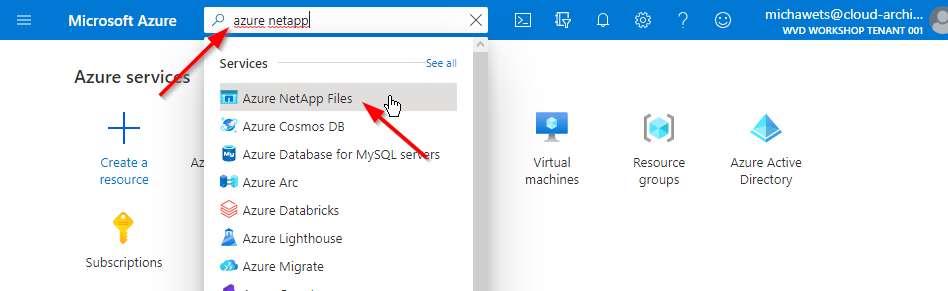
Search for ANF
- Search for Azure NetApp Files
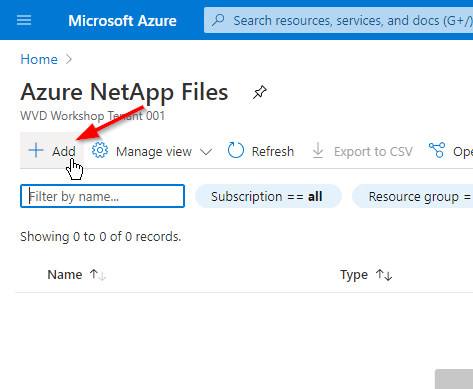
Create ANF Account
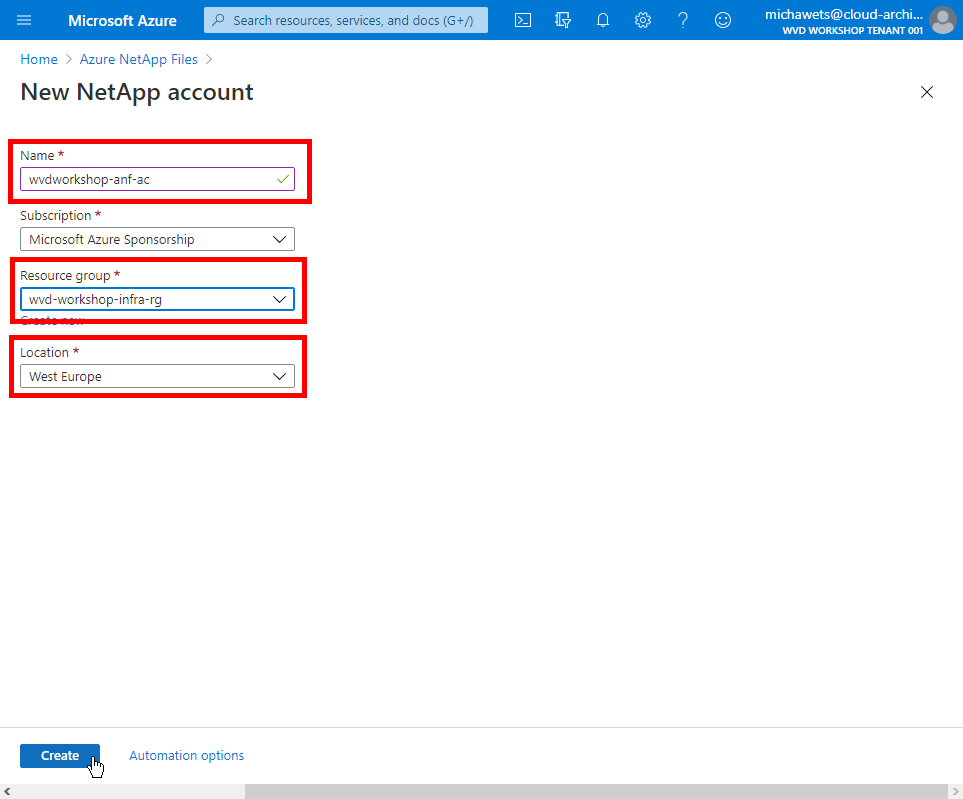
The first step is creating an ANF account.
- Click on Add
- Select the wvd-workshop-infra-rg Resource Group
Fill in the Name for the account, select West Europe as the Location and click on Create
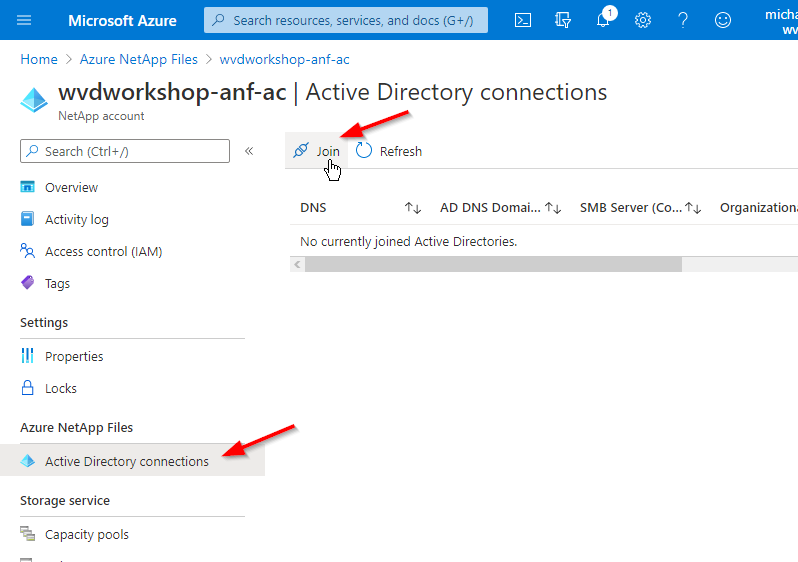
Add the Windows AD connection
To have an ANF share available in your Windows environment, you need to add a Windows AD Connection.
This connection will be used to join a ANF Volume to your Windows environment
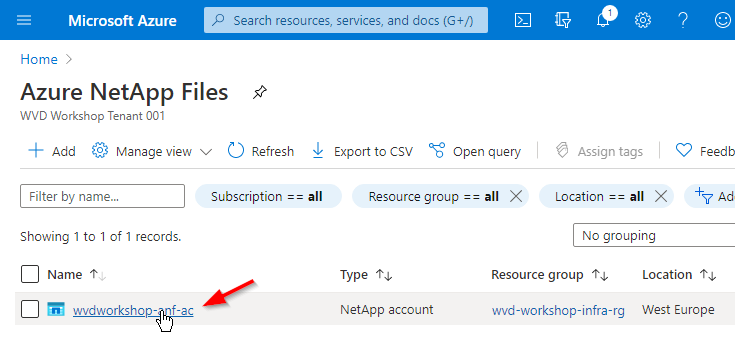
- Open the newly create ANF account
- Click on Active Directory connections, and click on Join
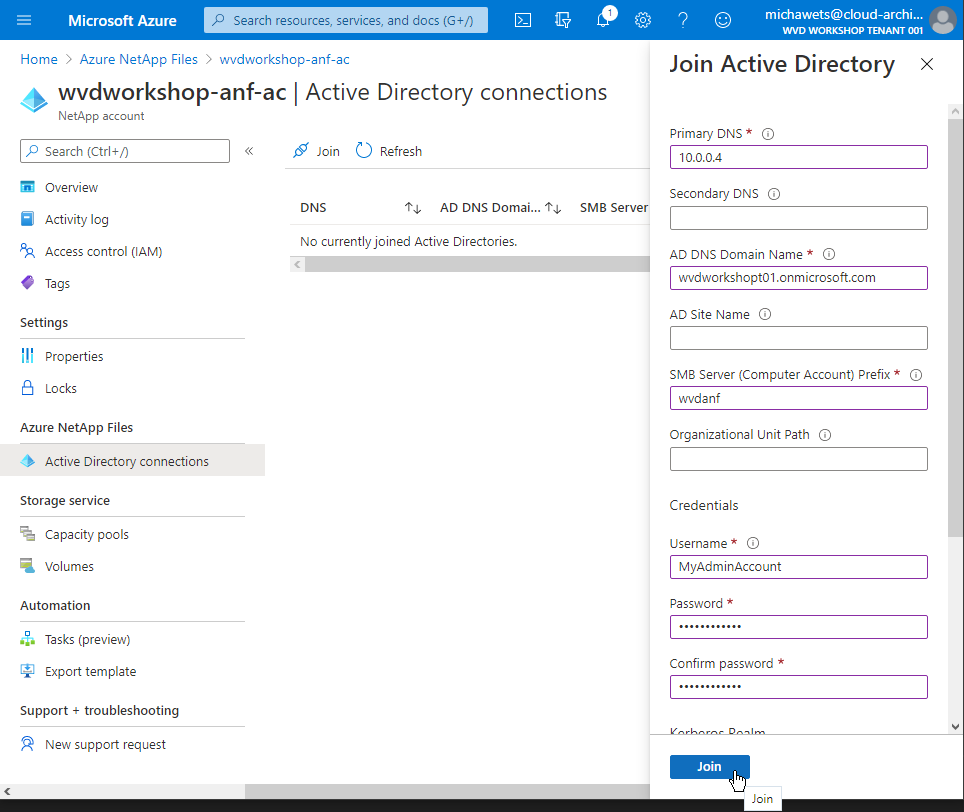
IMPORTANT
This step will not join the ANF account to the Windows AD yet!
This will simply add the AD connection to the Account
The actual AD Join will only take place when we create the ANF Volume!
- Fill in the required fields and click on Join
Create an ANF Capacity Pool
Setting up a capacity pool enables you to create volumes within it.
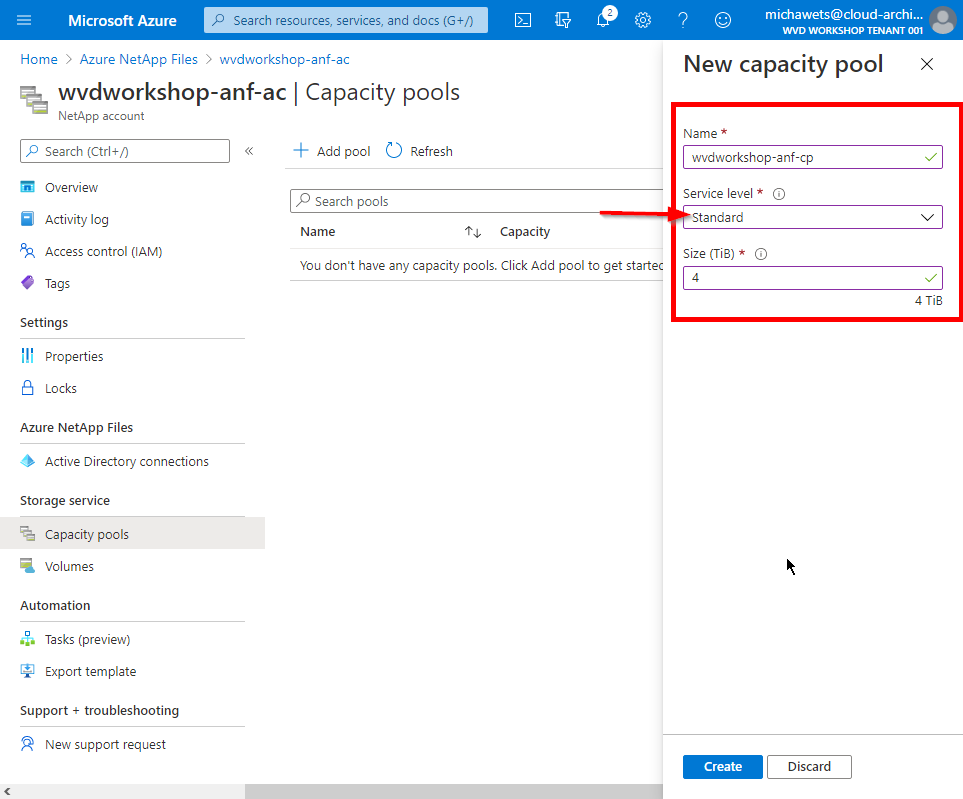
Microsoft also bills the amount of TB you have in Capacity Pools, not Volumes!
So if you have an empty Capacity Pool of 4TB (even without Volumes), you will still pay for 4TB!
- Click on Capacity Pools, and click on Add pool
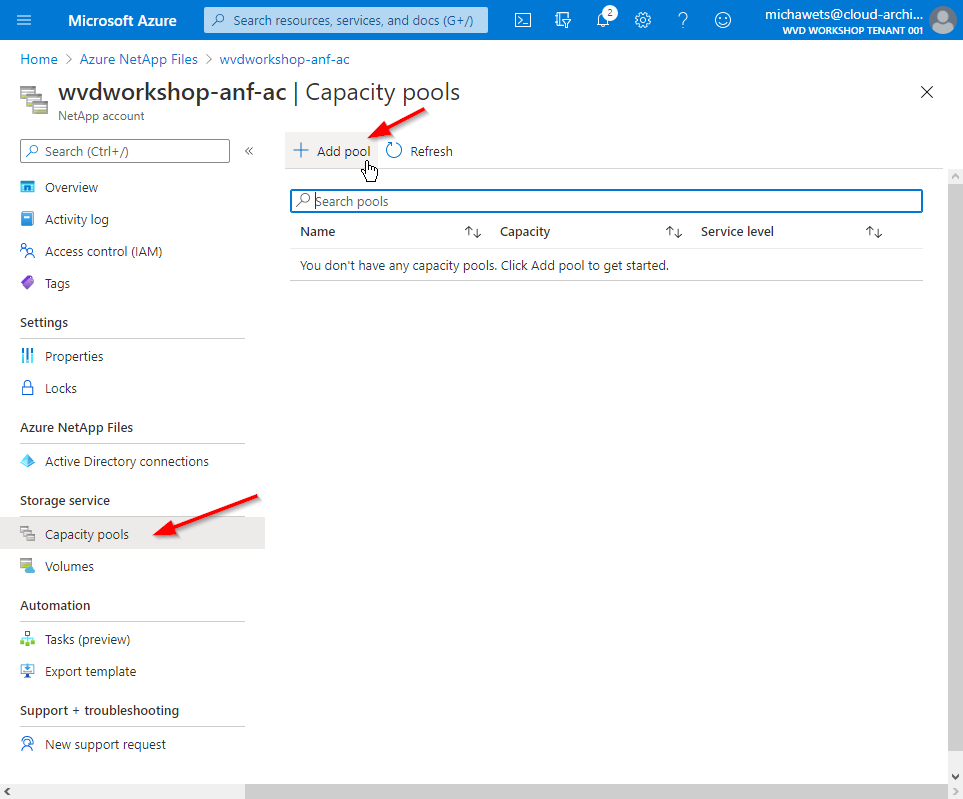
- Fill in the Name, select Standard (or any other level you want), and enter the amount of TB you want to provision (minimum of 4TB).
Create an ANF Volume
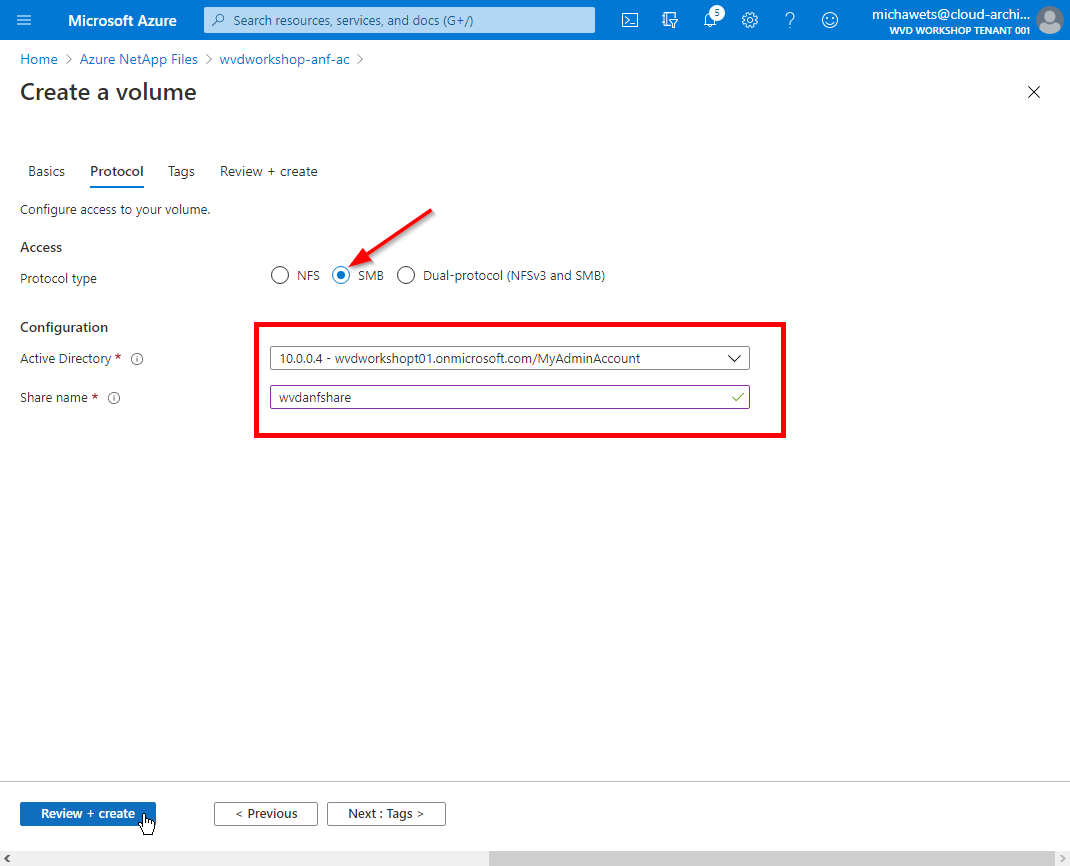
Azure NetApp Files supports creating volumes using NFS (NFSv3 and NFSv4.1), SMBv3, or dual protocol (NFSv3 and SMB).
A volume’s capacity consumption counts against its pool’s provisioned capacity.
In this workshop, we will create an SMBv3 volume which will be joined in our Windows AD environment.
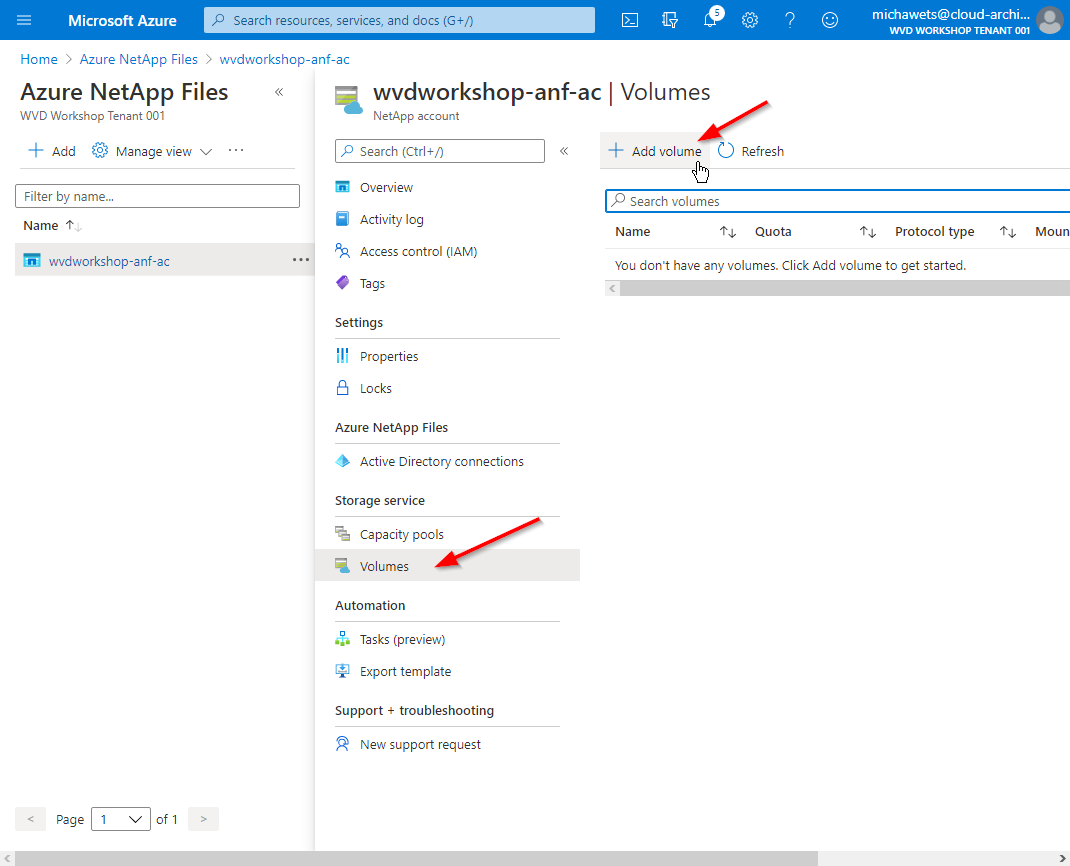
- Click on Volumes and click on +Add Volume
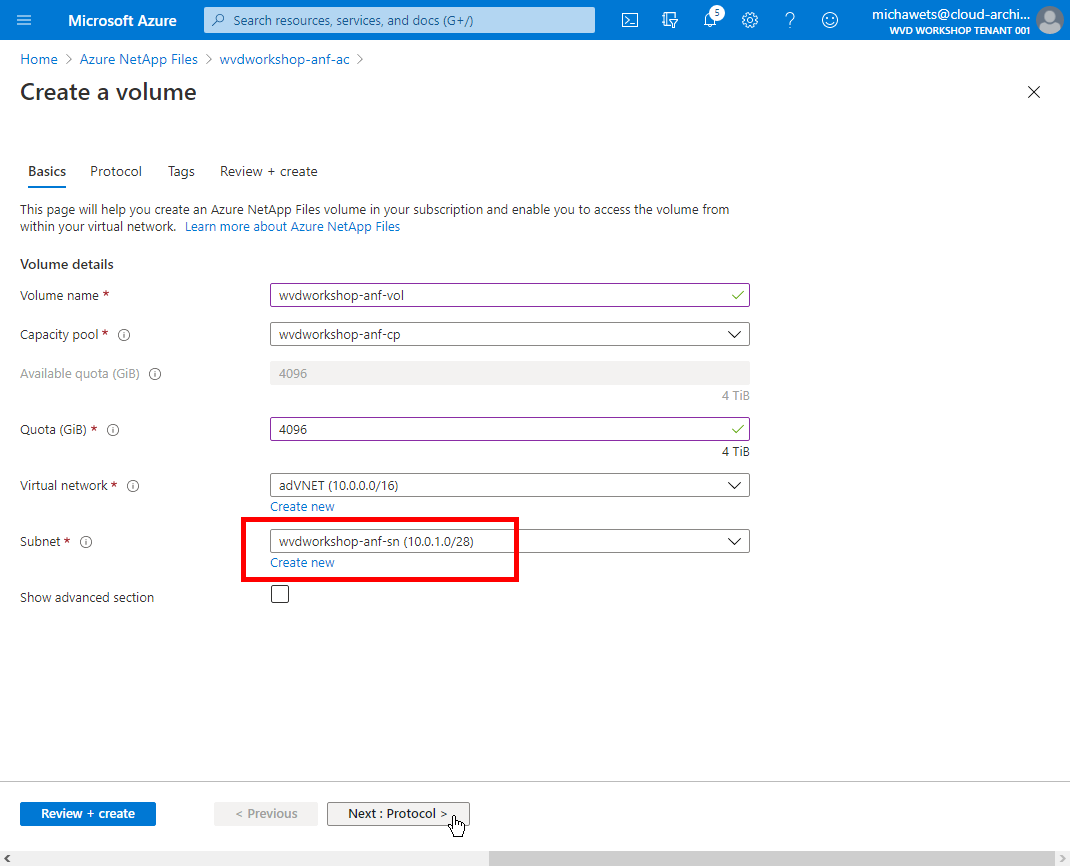
- Fill in the Basics from the Volume: Name, Quota (I suggest put it on 4TB for max performance), select the correct VNET & Subnet (with Netapp Delegate) and click on Next: Protocol >
Note
More information on the performance of the ANF Volumes can be found here
- Select the SMB protocol (as we will use it in Windows AD), select the AD Connection you created in the previous task, enter a Share name and click on Review + Create
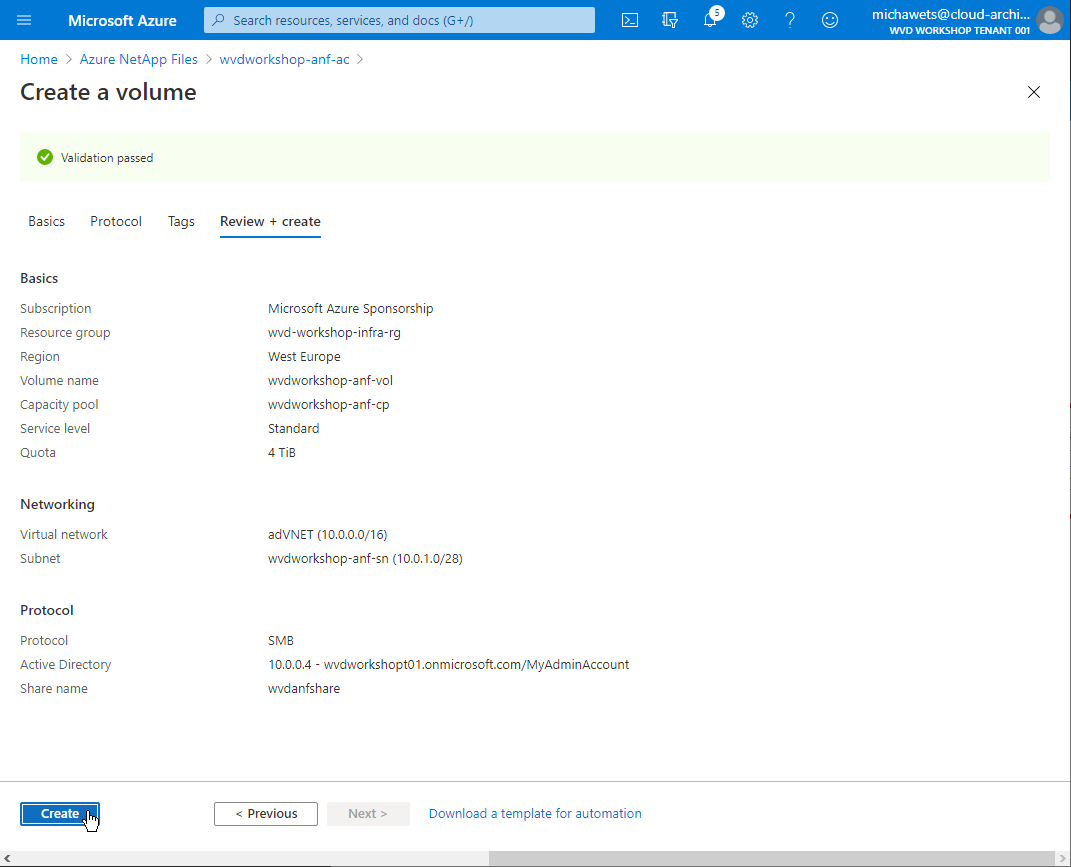
- Click on Create
This will start the deployment of the ANF Volume and will join the share into the Windows AD.
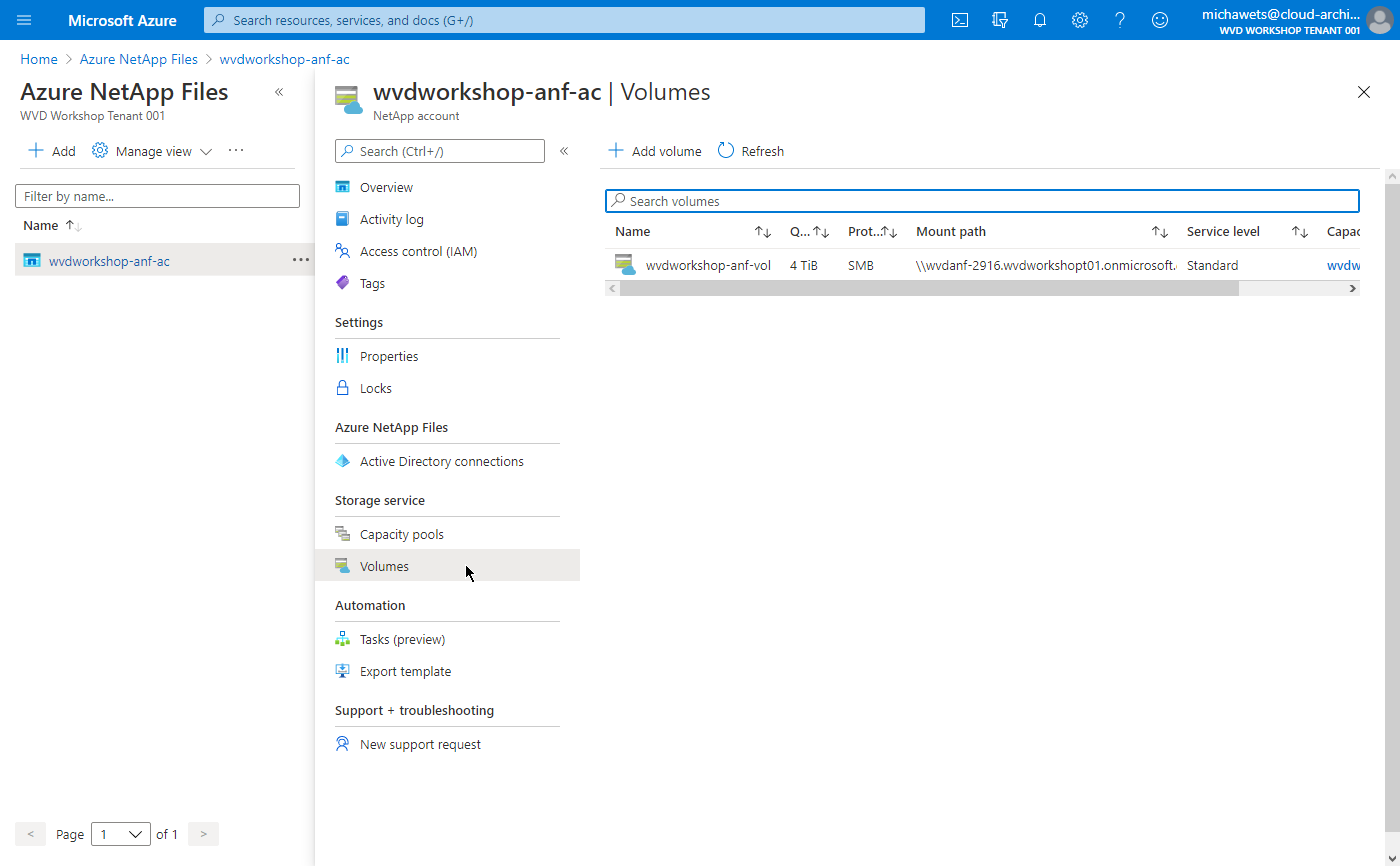
- After the deployment is finished, you will see the volume in the list
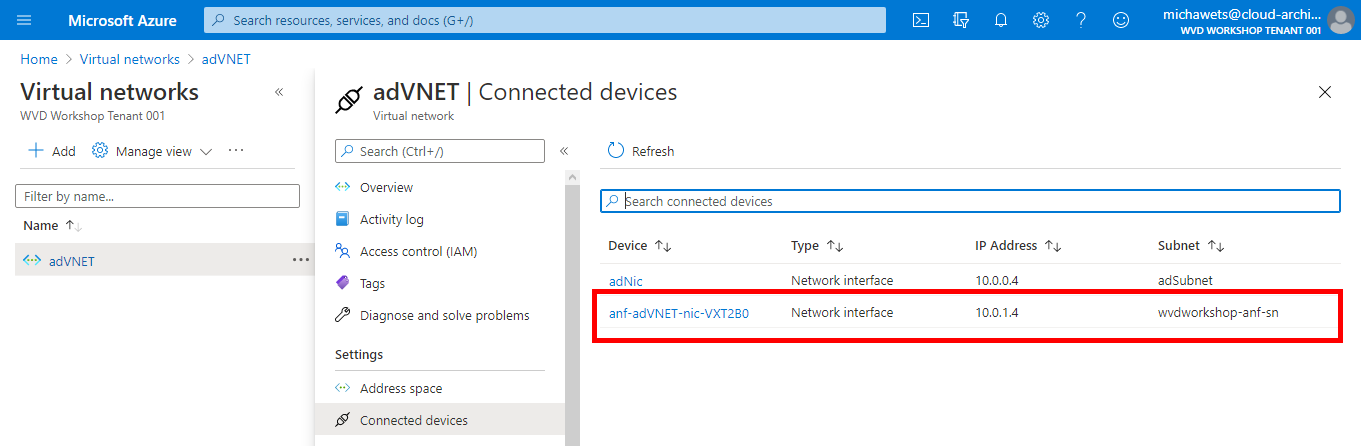
- You will also see a new Network Interface (NIC) in the Connected devices list in your Virtual Network
Configure the ANF share
-
RDP to your AdVM
-
Browse to the ANF share (full path can be found in the portal)
-
Create a new folder FSLogix-Profiles
-
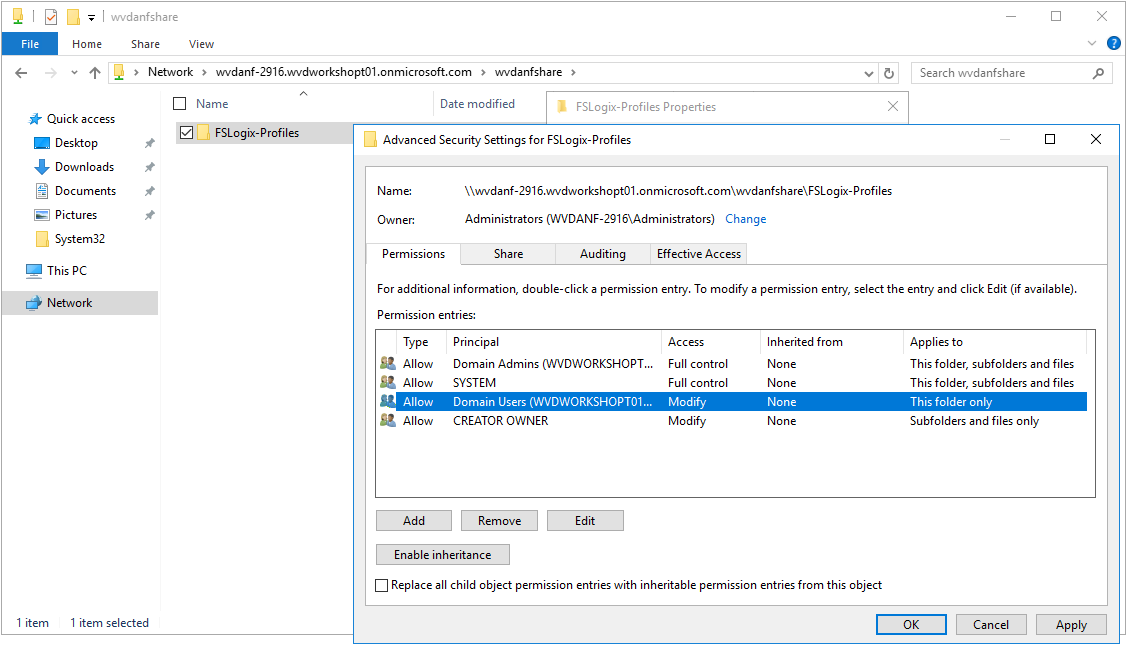
Change permissions on the folder to this Best Practice from FSLogix:
| User Account | Folder | Permissions |
|---|---|---|
| Domain Admins | This Folder, Subfolders, and files | Full Control |
| System | This Folder, Subfolders, and files | Full Control |
| Domain Users | This Folder Only | Modify |
| Creator/Owner | Subfolders and Files Only | Modify |
- Change the FSLogix policy (as seen in the previous steps) and point the FSLogix share to the new Azure NetApp Files share
This will be something like \\wvdanf-2916.wvdworkshopt01.onmicrosoft.com\wvdanfshare\FSLogix-Profiles