Start / Create custom WVD image
Create custom WVD image
In this step, you will create a custom WVD image containing FSLogix, Acrobat Reader & Visual Studio Code pre-installed. In this way, your newly deployed WVD Sessionhosts will already have this software available.
We will do this in 4 sections:
- Deploy a new VM using Windows 10 Enterprise Multi Session from the Marketplace
- Connect to new VM & install the needed software
- Sysprep the VM
- Create an Azure Managed Image from the VM
Create new VM
-
Sign in on the Azure Portal with your credentials.
- Click on Resource Groups & create a new Resource Group in west-europe:
- wvd-workshop-tempimagevm-rg
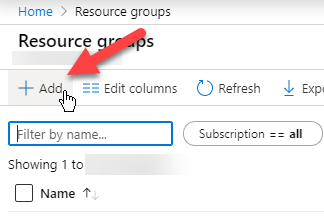
- wvd-workshop-tempimagevm-rg
-
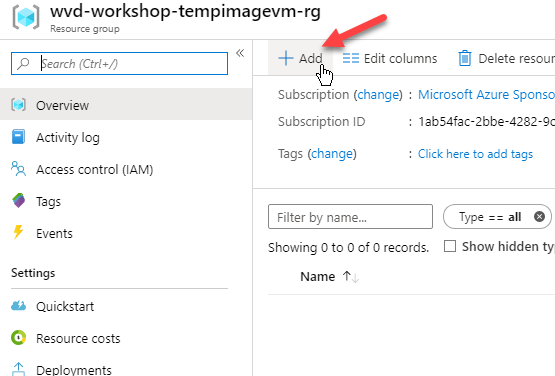
Open the wvd-workshop-tempimagevm-rg Resource Group & click on Add.
-
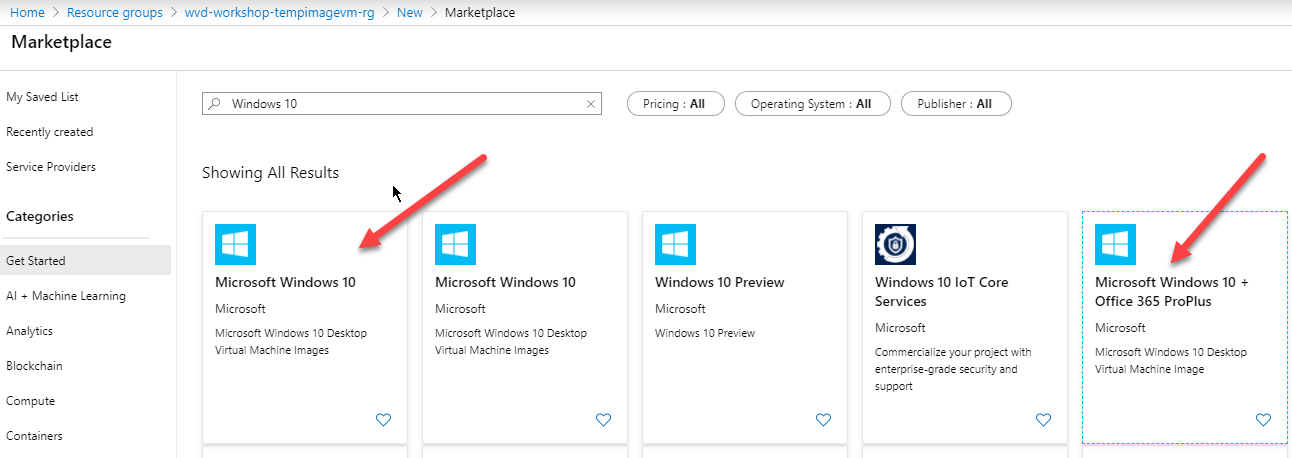
Search for Microsoft Windows 10 and hit Enter
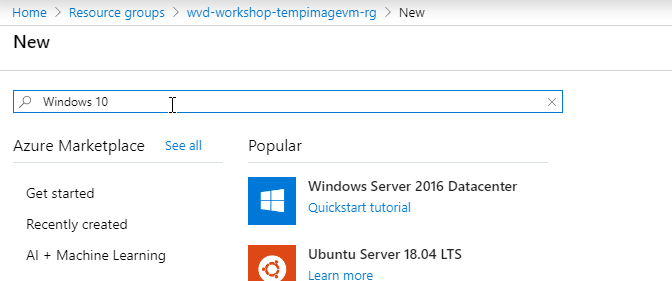
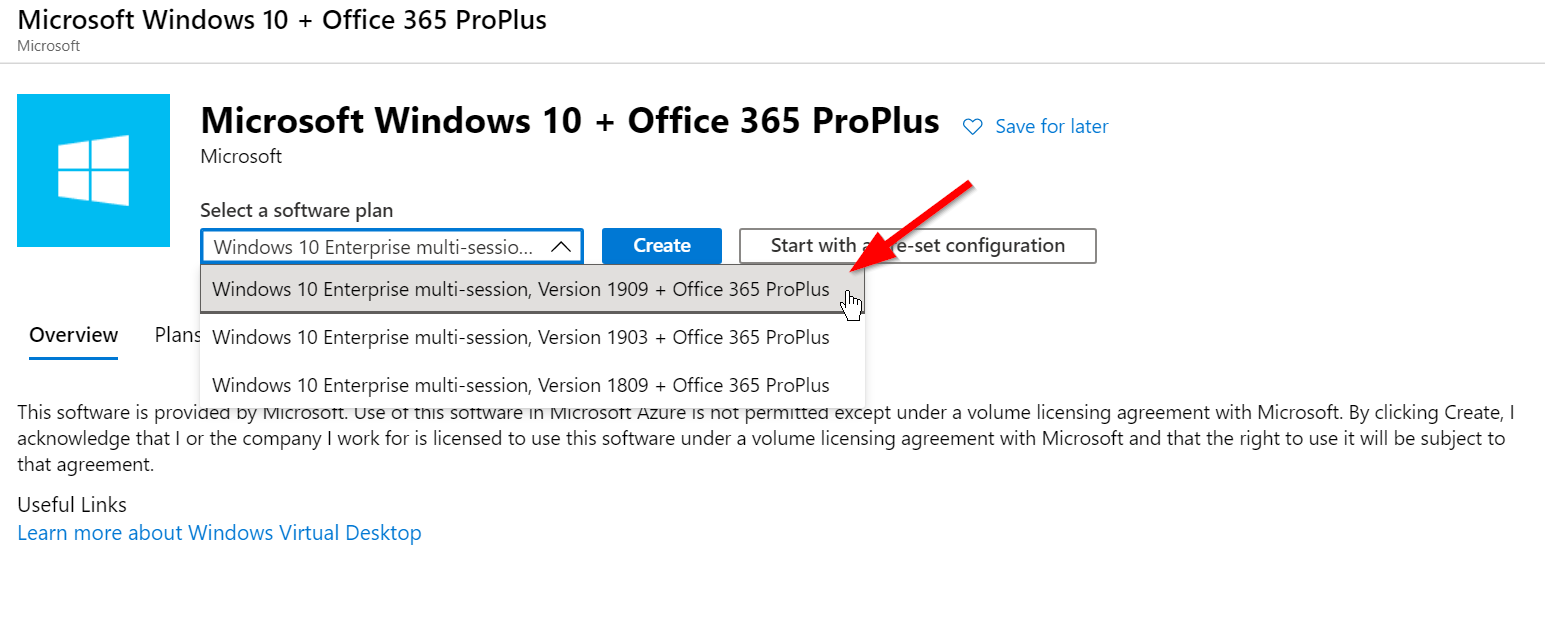
- Select the Windows 10 Version you want: with or without Office 365 ProPlus & click on Create
IMPORTANT!
Select a Windows 10 Enterprise multi-session from the list!
___
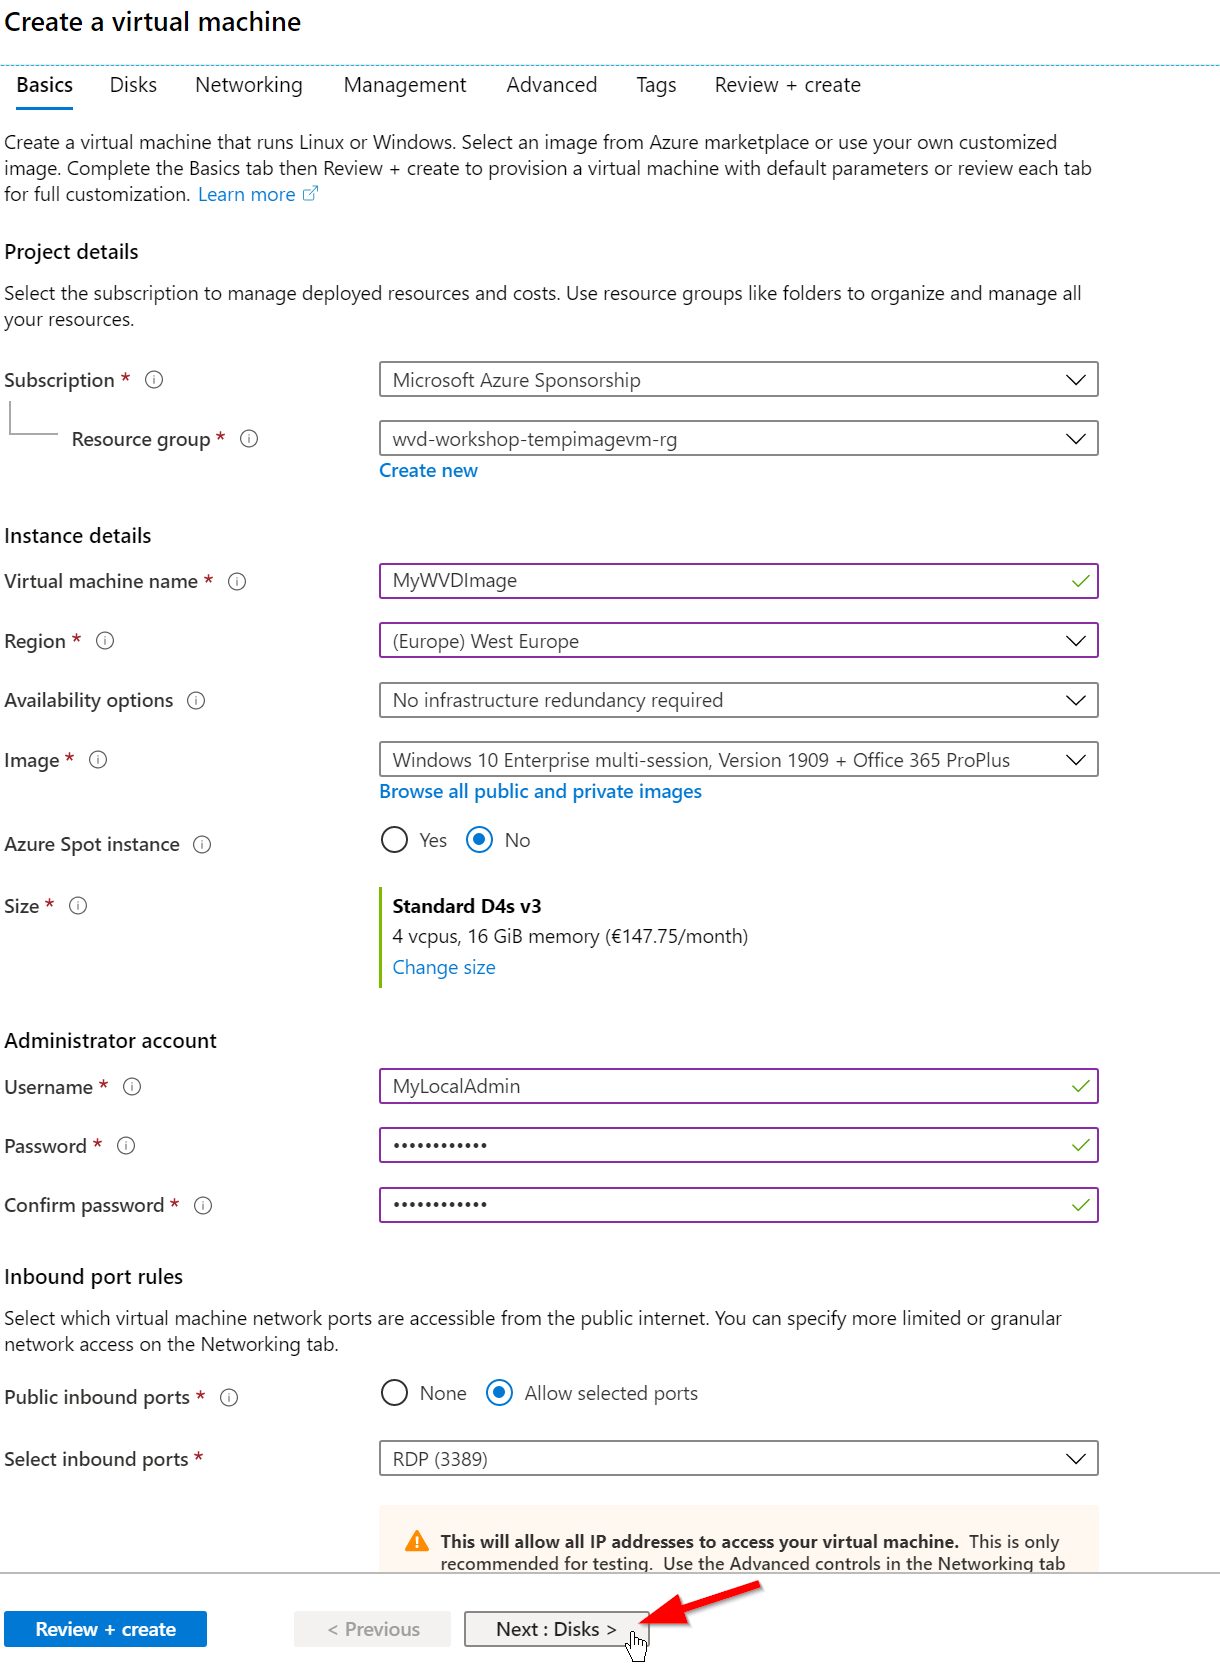
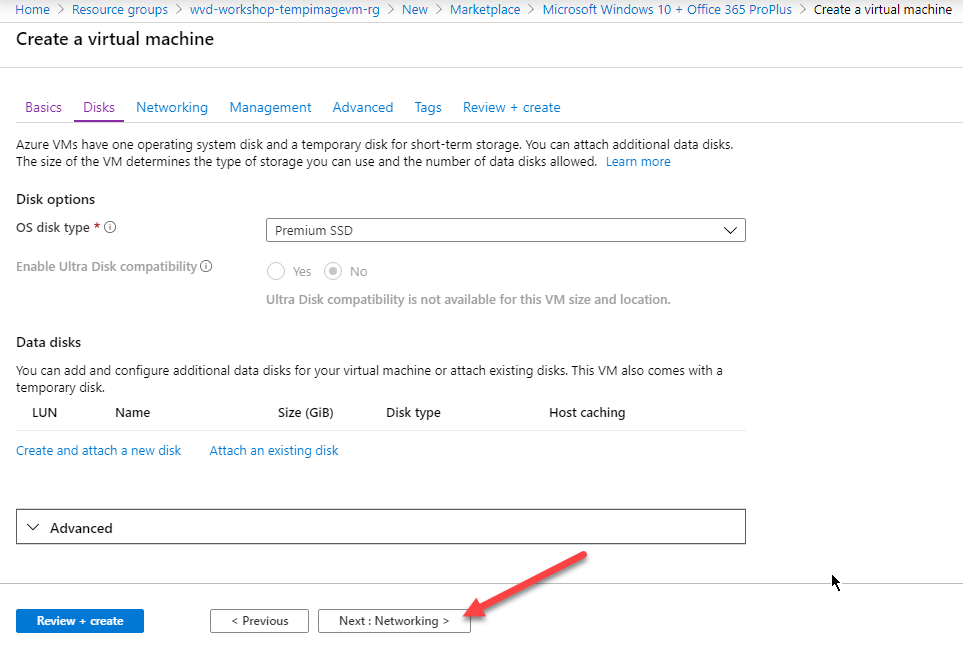
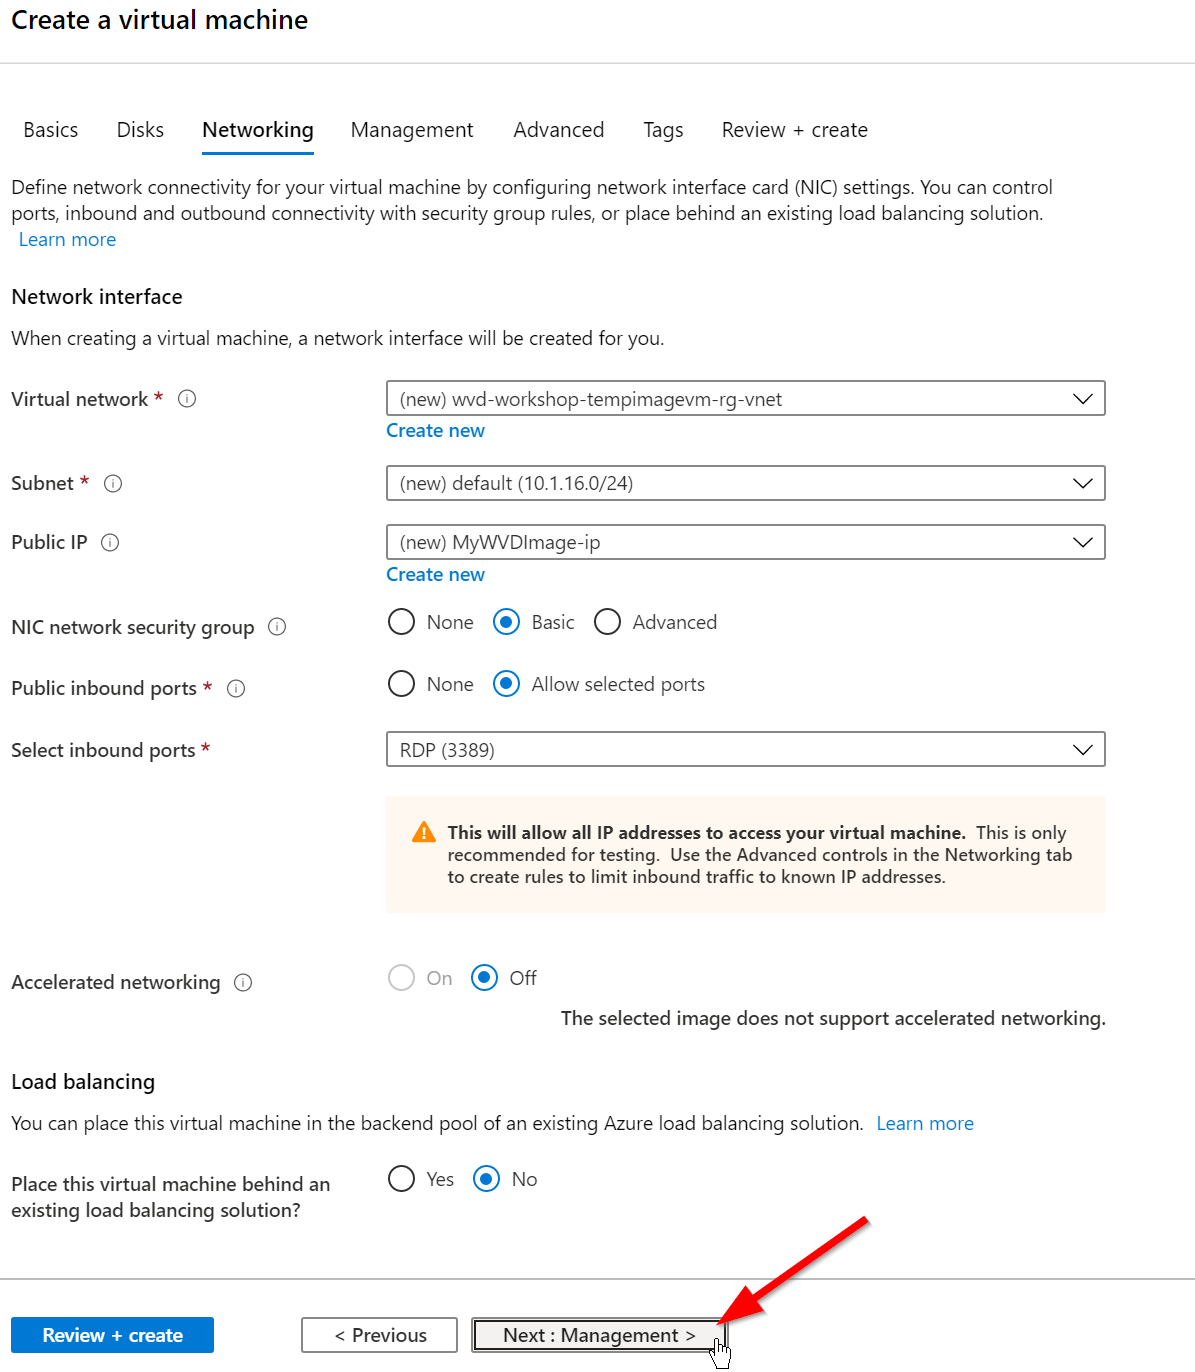
- Fill in the wizard fields to …
- Create a new VM from the Marketplace
- Select Premium SSD disk
- Create a new (temporary) VNET & Subnet
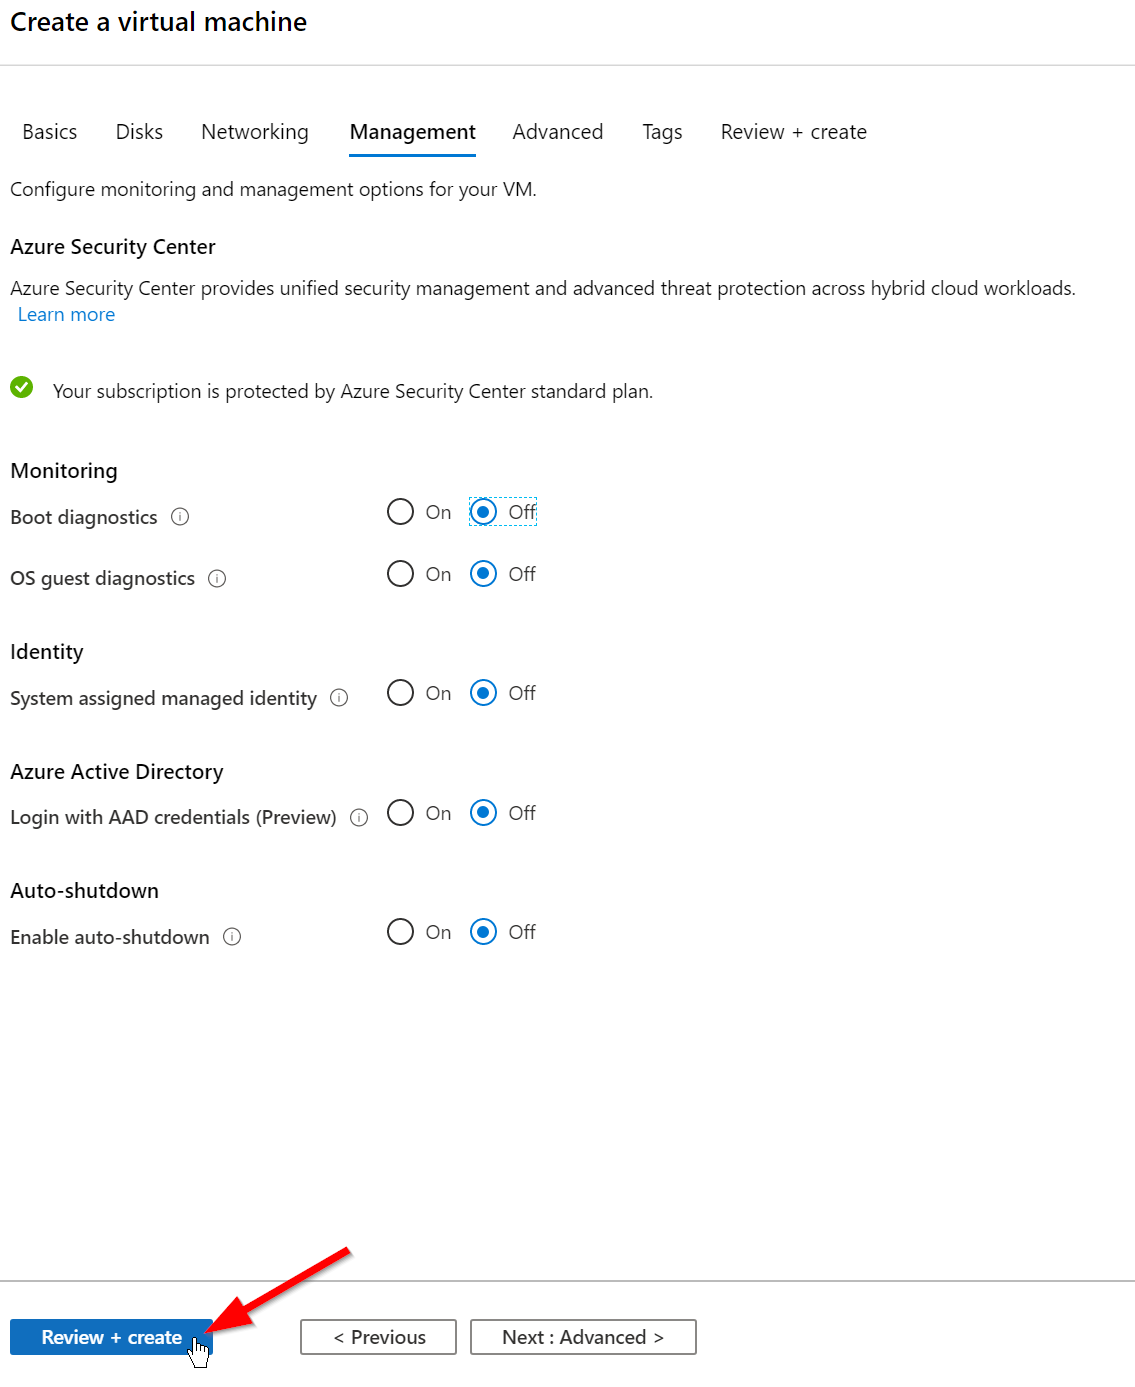
- Disable Boot Diagnostics & Security Center (if requested)
Connect to new VM & install software
-
When the Deployment is finished, you go to the Resource Group and open the newly created VM.
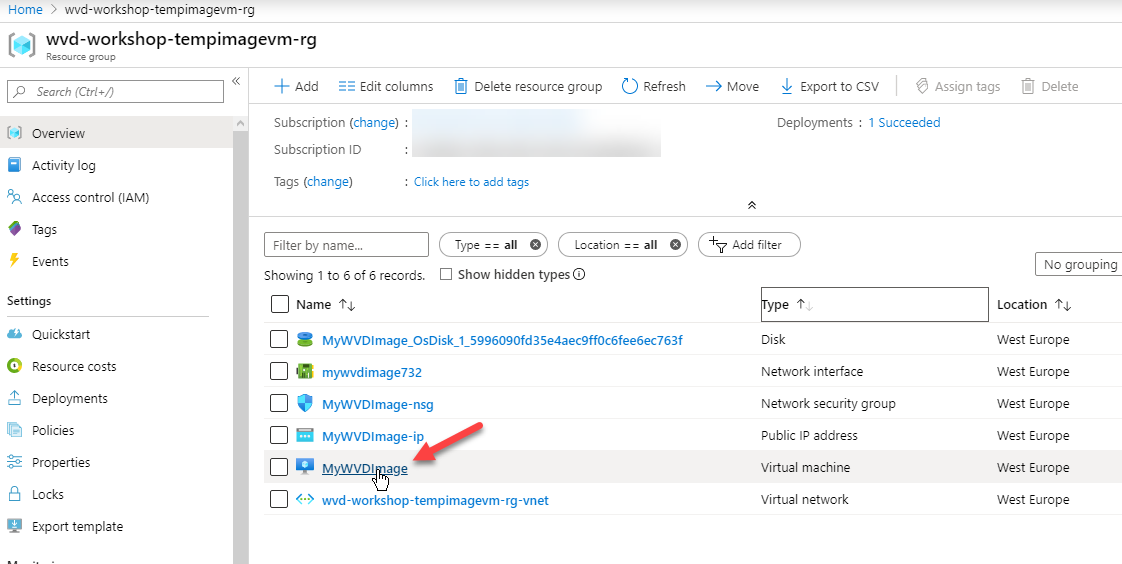
- Connect to the Image VM using the Connect button, or by using the Public IP in MSTSC.EXE
In my example, this would bemstsc /v:40.115.5.174
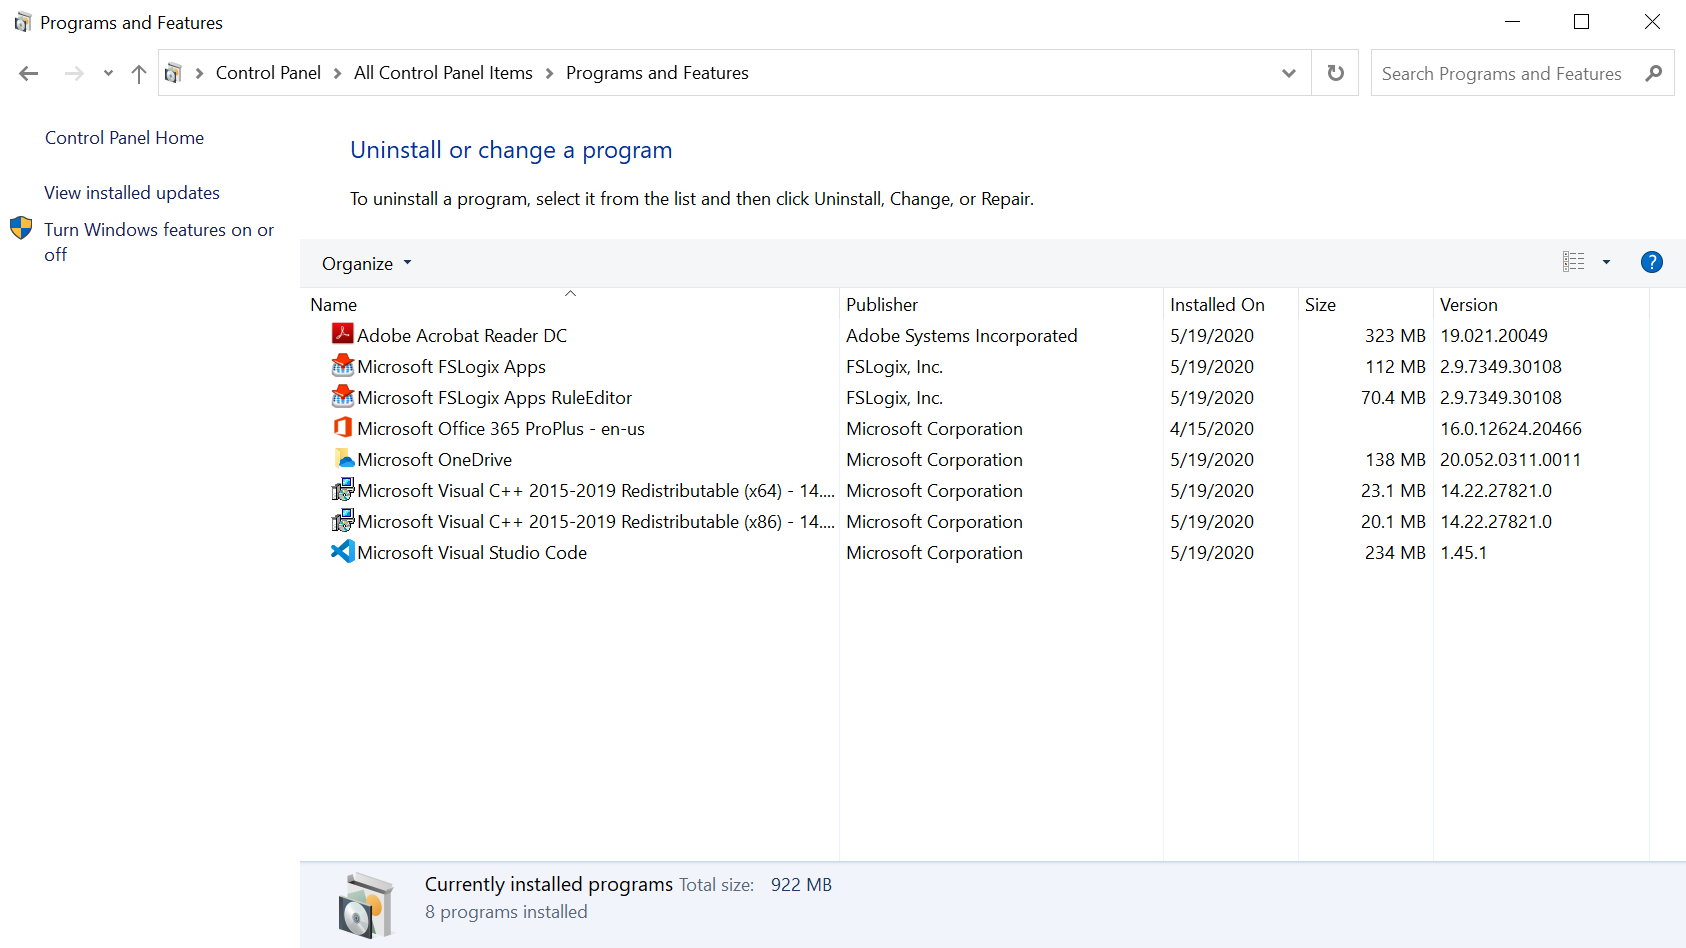
- Install all the software you want available in your image.
In our example, we will install FSLogix, Acrobat Reader & Visual Studio Code
You can find the System installers here:- FSLogix installer
Extract & run .\FSLogix_Apps_..yyyy.xxxxx\x64\Release\FSLogixAppsSetup.exe” - Visual Studio Code system installer
- Acrobat Reader
- FSLogix installer
Sysprep the VM
-
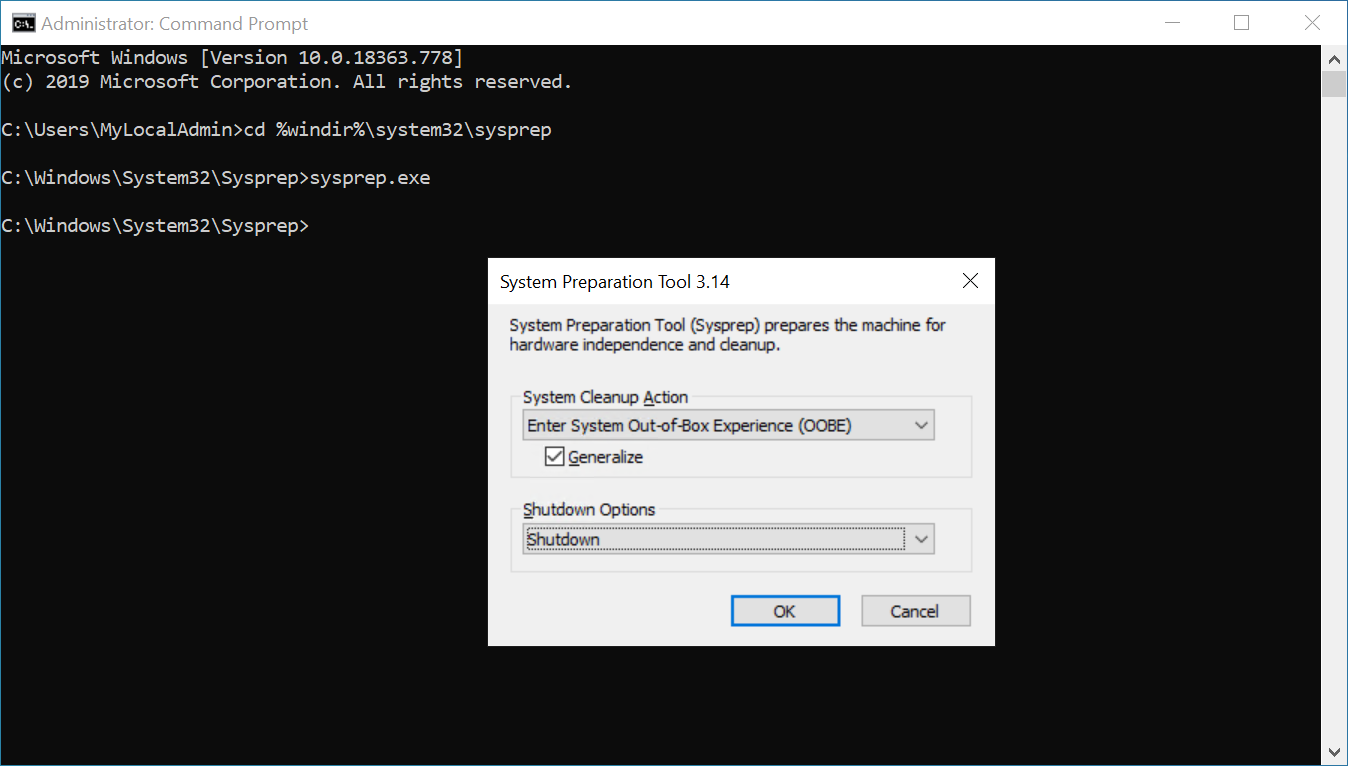
Open a Command Prompt window as an administrator. Change the directory to %windir%\system32\sysprep, and then run sysprep.exe.
-
In the System Preparation Tool dialog box, select Enter System Out-of-Box Experience (OOBE) and select the Generalize check box.
-
For Shutdown Options, select Shutdown.
-
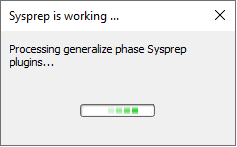
Select OK.
Create an Azure Managed Image
-
Open the Azure portal.
-
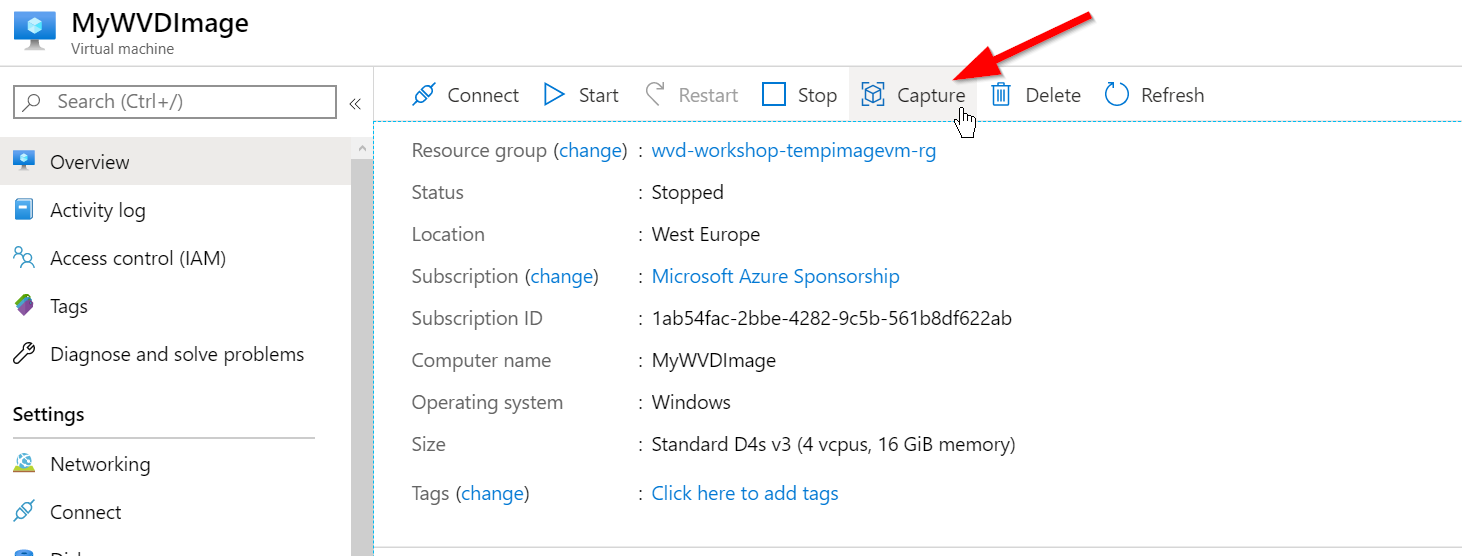
Select the Image VM from the Virtual Machine list.
-
In the Virtual machine page for the VM, on the upper menu, select Capture.
- Complete the Capture Wizard
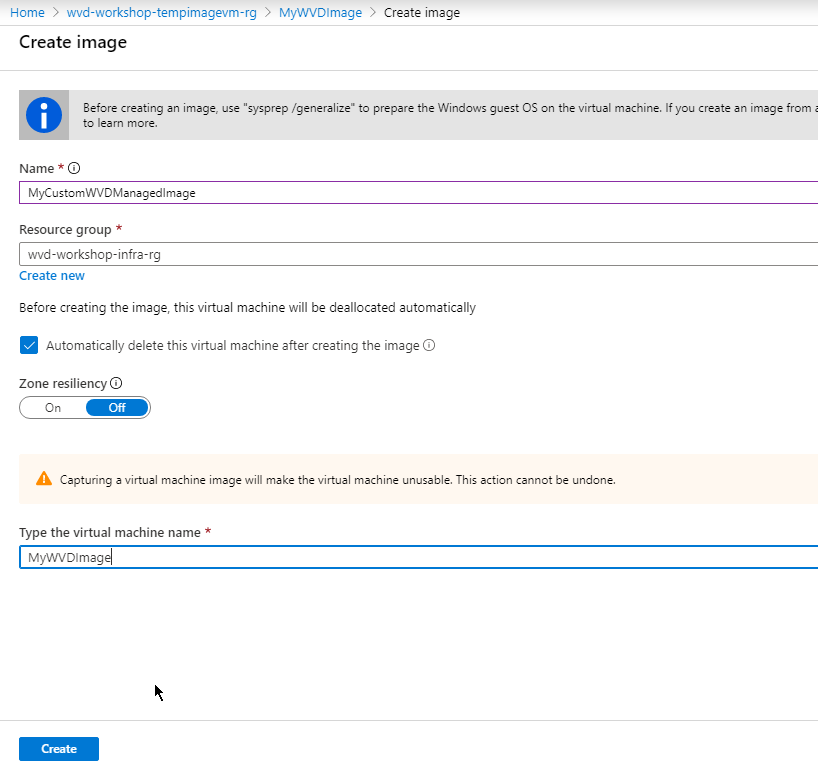
- For Name, enter “MyCustomWVDManagedImage”.
- For Resource group, select the wvd-workshop-infra-rg resource group from the drop-down list.
- Select Automatically delete this virtual machine after creating the image.
- Select Off for Zone resiliency.
- Type in the Image VM name (when requested)
- Click on Create to create the image.
-
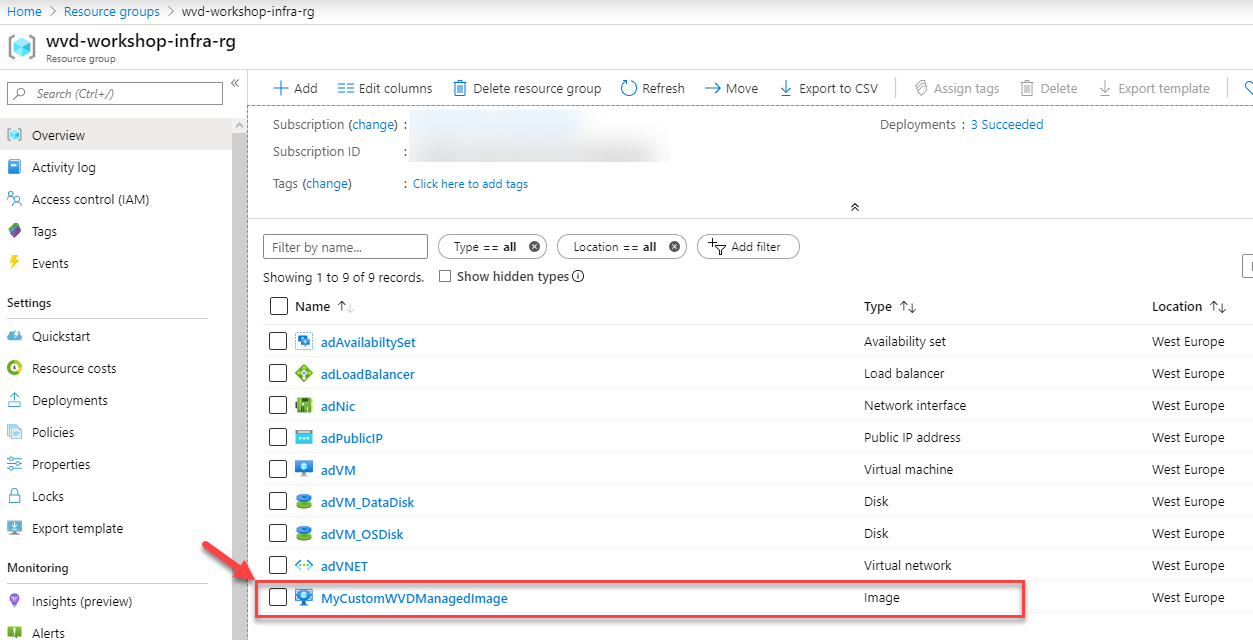
After the image is created, you can find it as an Azure Managed Image in the resource group.
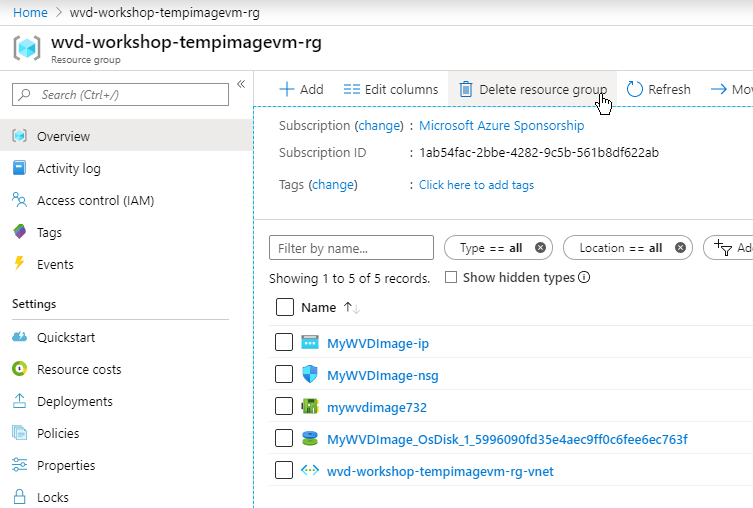
- Delete the wvd-workshop-tempimagevm-rg Resource Group, as this is no longer needed
