Start / Create custom WVD image
Create custom WVD image using Azure Image Builder (AIB)
In this step, you will create a custom WVD image containing FSLogix, Acrobat Reader & Visual Studio Code pre-installed.
But instead of installing this software manually, we will use Azure Image Builder (AIB).
In this way, your newly deployed WVD Sessionhosts will already have this software available.
We will do this in 4 sections:
- Prepare your environment for AIB
- Prepare the AIB image template
- Invoke the AIB Build
- Validate Image creation
Prepare your environment for AIB
- Connect to Azure using Powershell
Connect-AzAccount
Get-AzSubscription | Out-GridView -PassThru | Select-AzSubscription
- Set up the base variables & create a new Resource Group
$currentAzContext = Get-AzContext
# destination image resource group
$imageResourceGroup = "myimagebuilder-rg"
$location = "westeurope"
$subscriptionID = $currentAzContext.Subscription.Id
$imageName = "Win1020h2"
$runOutputName = "win1020h2ManImg01ro"
$imageTemplateName = "window1020h2Template01"
$runOutputName = "winSvrSigR01"
$imageRoleDefName = "Azure Image Builder Image Def"
$idenityName = "aibIdentity"
# create resource group for image and image template resource
if ($null -eq (Get-AzResourceGroup -Name $imageResourceGroup -ErrorAction SilentlyContinue)) {
    New-AzResourceGroup -Name $imageResourceGroup -Location $location
}
- Registering the Resource Provider for AIB
$resourceproviderfeature = Get-AzProviderFeature -ProviderNamespace Microsoft.VirtualMachineImages -FeatureName VirtualMachineTemplatePreview
If ($resourceproviderfeature.RegistrationState -ne "Registered") {
    Write-Host "Resource Provider not yet Registered! Registering now..."
    Register-AzResourceProvider -ProviderNamespace Microsoft.VirtualMachineImages
    Write-Host "Waiting loop until Resource Provider is Registered..."
    Do {
        Start-Sleep -Seconds 5
    }
    While ((Get-AzResourceProvider -ProviderNamespace Microsoft.VirtualMachineImages).RegistrationState -ne "Registered")

    Write-Host "Registering Feature now..."
    Register-AzProviderFeature -ProviderNamespace Microsoft.VirtualMachineImages -FeatureName VirtualMachineTemplatePreview
    Do {
        Start-Sleep -Seconds 5
    }
    While ((Get-AzProviderFeature -ProviderNamespace Microsoft.VirtualMachineImages -FeatureName VirtualMachineTemplatePreview).RegistrationState -ne "Registered")
}
Write-Host "Resource Provider OK."

Get-AzResourceProvider -ProviderNamespace Microsoft.Compute, Microsoft.KeyVault, Microsoft.Storage | Where-Object RegistrationState -ne Registered | Register-AzResourceProvider
- Registering the Resource Provider for Managed Identities
$resourceprovider = Get-AzResourceProvider -ProviderNamespace Microsoft.ManagedIdentity
If ($resourceprovider.RegistrationState -ne "Registered") {
    Write-Host "Resource Provider not yet Registered! Registering now..."
    Register-AzResourceProvider -ProviderNamespace Microsoft.ManagedIdentity
    Write-Host "Waiting loop until Resource Provider is Registered..."
    Do {
        Start-Sleep -Seconds 5
    }
    While ((Get-AzResourceProvider -ProviderNamespace Microsoft.ManagedIdentity).RegistrationState -ne "Registered")
}
Write-Host "Resource Provider OK."
- Install & Import Az.ManagedServiceIdentity & Az.ImageBuilder
if ($null -eq (Get-Module -ListAvailable Az.ManagedServiceIdentity)) {
    Install-Module -Name Az.ManagedServiceIdentity -Scope CurrentUser -Force
}
if ($null -eq (Get-Module -ListAvailable Az.ImageBuilder)) {
    Install-Module -Name Az.ImageBuilder -Scope CurrentUser -Force
}
Import-Module -Name Az.ManagedServiceIdentity
Import-Module -Name Az.ImageBuilder
- Create a Managed Identity
We will create a Managed Identity which will be used to execute the AIB service & create the image.
if ($null -eq (Get-AzUserAssignedIdentity -Name $idenityName -ResourceGroupName $imageResourceGroup -ErrorAction SilentlyContinue)) {
    New-AzUserAssignedIdentity -ResourceGroupName $imageResourceGroup -Name $idenityName
}


$idenityNameResourceId = $(Get-AzUserAssignedIdentity -ResourceGroupName $imageResourceGroup -Name $idenityName).Id
$idenityNamePrincipalId = $(Get-AzUserAssignedIdentity -ResourceGroupName $imageResourceGroup -Name $idenityName).PrincipalId
- Create Custom Role definition
We don’t want to give the identity to much permissions, therefor we create a Custom RBAC role to limit the permissions
if ($null -eq (Get-AzRoleDefinition -Name $imageRoleDefName -ErrorAction SilentlyContinue)) {
    #Custom Role definition does not exist. Creating now...
    $aibRoleImageCreationUrl = "https://raw.githubusercontent.com/danielsollondon/azvmimagebuilder/master/solutions/12_Creating_AIB_Security_Roles/aibRoleImageCreation.json"
    $aibRoleImageCreationPath = "aibRoleImageCreation.json"

    # download config
    Invoke-WebRequest -Uri $aibRoleImageCreationUrl -OutFile $aibRoleImageCreationPath -UseBasicParsing

    ((Get-Content -path $aibRoleImageCreationPath -Raw) -replace '<subscriptionID>', $subscriptionID) | Set-Content -Path $aibRoleImageCreationPath
    ((Get-Content -path $aibRoleImageCreationPath -Raw) -replace '<rgName>', $imageResourceGroup) | Set-Content -Path $aibRoleImageCreationPath
    ((Get-Content -path $aibRoleImageCreationPath -Raw) -replace 'Azure Image Builder Service Image Creation Role', $imageRoleDefName) | Set-Content -Path $aibRoleImageCreationPath

    # create role definition
    New-AzRoleDefinition -InputFile  ./aibRoleImageCreation.json
    ### NOTE: If you see this error: 'New-AzRoleDefinition: Role definition limit exceeded. No more role definitions can be created.' See this article to resolve: https://docs.microsoft.com/en-us/azure/role-based-access-control/troubleshooting
}

#Check Role Assignment
if ($null -eq (Get-AzRoleAssignment -ObjectId $idenityNamePrincipalId -RoleDefinitionName $imageRoleDefName -Scope "/subscriptions/$subscriptionID/resourceGroups/$imageResourceGroup" -ErrorAction SilentlyContinue)) {
    # grant role definition to image builder service principal
    New-AzRoleAssignment -ObjectId $idenityNamePrincipalId -RoleDefinitionName $imageRoleDefName -Scope "/subscriptions/$subscriptionID/resourceGroups/$imageResourceGroup"
}
Prepare the AIB image template
In this step, we will prepare the Azure Image Builder Template, describing the source, the applications we want install and how to distrubute the new image.
- Prepare the AIB image template
$templateUrl = "https://raw.githubusercontent.com/michawets/AzureImageBuilderPOC/master/clean_template_win1020h2.json"
$templateFilePath = "helloImageTemplateWin01.json"

# download configs
Invoke-WebRequest -Uri $templateUrl -OutFile $templateFilePath -UseBasicParsing

((Get-Content -path $templateFilePath -Raw) -replace '<subscriptionID>', $subscriptionID) | Set-Content -Path $templateFilePath
((Get-Content -path $templateFilePath -Raw) -replace '<rgName>', $imageResourceGroup) | Set-Content -Path $templateFilePath
((Get-Content -path $templateFilePath -Raw) -replace '<region>', $location) | Set-Content -Path $templateFilePath
((Get-Content -path $templateFilePath -Raw) -replace '<runOutputName>', $runOutputName) | Set-Content -Path $templateFilePath
((Get-Content -path $templateFilePath -Raw) -replace '<imageName>', $imageName) | Set-Content -Path $templateFilePath
((Get-Content -path $templateFilePath -Raw) -replace '<imgBuilderId>', $idenityNameResourceId) | Set-Content -Path $templateFilePath
- Check if image template already exists and remove if needed
$resourcetowatch = Get-AzImageBuilderTemplate -ResourceGroupName $imageResourceGroup -ImageTemplateName $ImageTemplateName -ErrorAction SilentlyContinue
If ($null -ne $resourcetowatch) {
    Write-Host "Template found, removing ..."
    Remove-AzImageBuilderTemplate -ImageTemplateName $ImageTemplateName -ResourceGroupName $imageResourceGroup
}
- Deploy the AIB image template
Now we will push the image template to the new Resource Group. This does not start the BUILD yet
New-AzResourceGroupDeployment -ResourceGroupName $imageResourceGroup -TemplateFile $templateFilePath -api-version "2019-05-01-preview" -imageTemplateName $imageTemplateName -svclocation $location
NOTE
This will take minute, as validation is run (security / dependencies etc.)
Invoke the AIB Build
In this step, we will request a Build from the AIB image template that we just uploaded to Azure.
This will start the AIB service and the script will wait until the build is completed
Invoke-AzResourceAction -ResourceName $imageTemplateName -ResourceGroupName $imageResourceGroup -ResourceType Microsoft.VirtualMachineImages/imageTemplates -ApiVersion "2020-02-14" -Action Run -Force
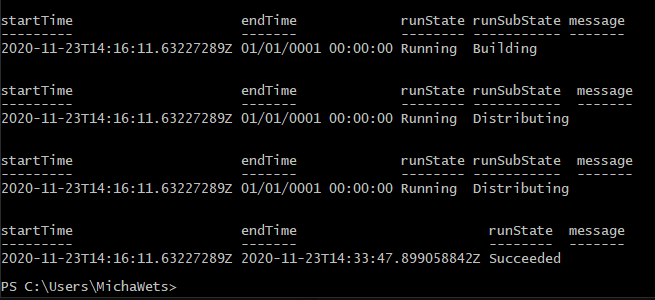
#Get Status of the Image Build and Query
$resourcetowatch = Get-AzResource -ResourceGroupName $imageResourceGroup -ResourceType Microsoft.VirtualMachineImages/imageTemplates -Name $imageTemplateName
do {
$status = (Get-AzResource -ResourceGroupName $imageResourceGroup -ResourceType Microsoft.VirtualMachineImages/imageTemplates -Name $imageTemplateName).Properties.lastRunStatus
$status | Format-Table *
Start-Sleep -Seconds 30
} while ($status.runState -eq "Running")
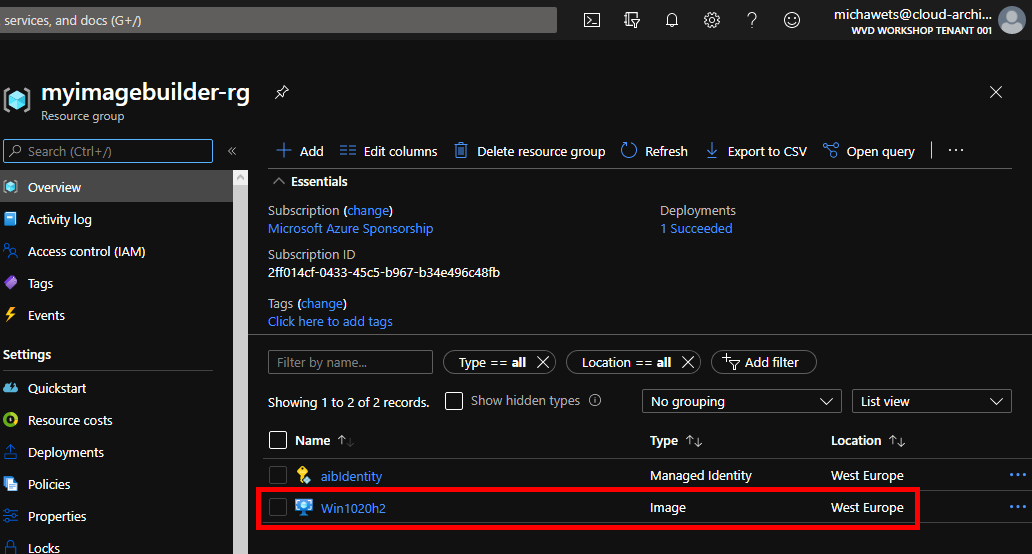
Validate Image creation
Once the Build has completed successfully, you should see the Resource Group myimagebuilder-rg, with the new Custom Image: