Start / Verify your Virtual Network DNS settings
Verify your Virtual Network (VNET) DNS settings
-
Open the Azure Portal
-
Go to Virtual Networks
-
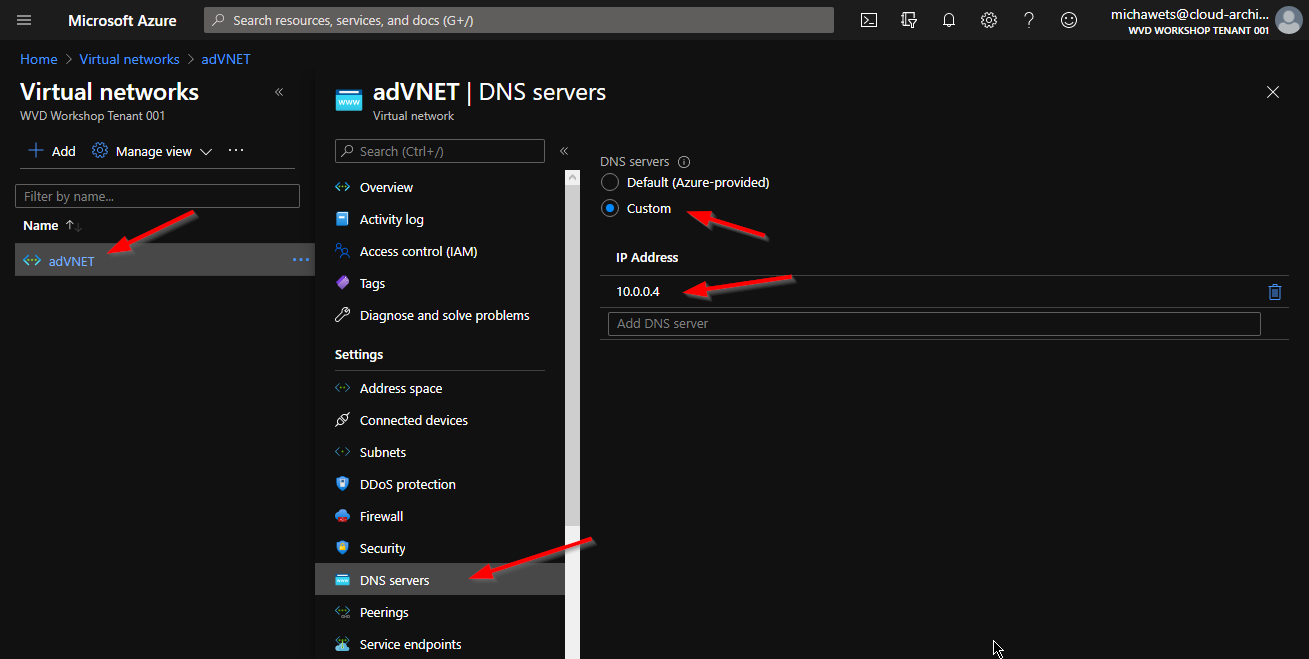
Open your Virtual Network (if you deployed the Windows VM with AD, the VNET will be named adVNET)
-
Click on DNS Servers
-
Validate that a custom DNS server IP is filled in, and that the IP is your Domain Controller.
If you deployed the Windows VM with AD, the IP address should be 10.0.0.4)
